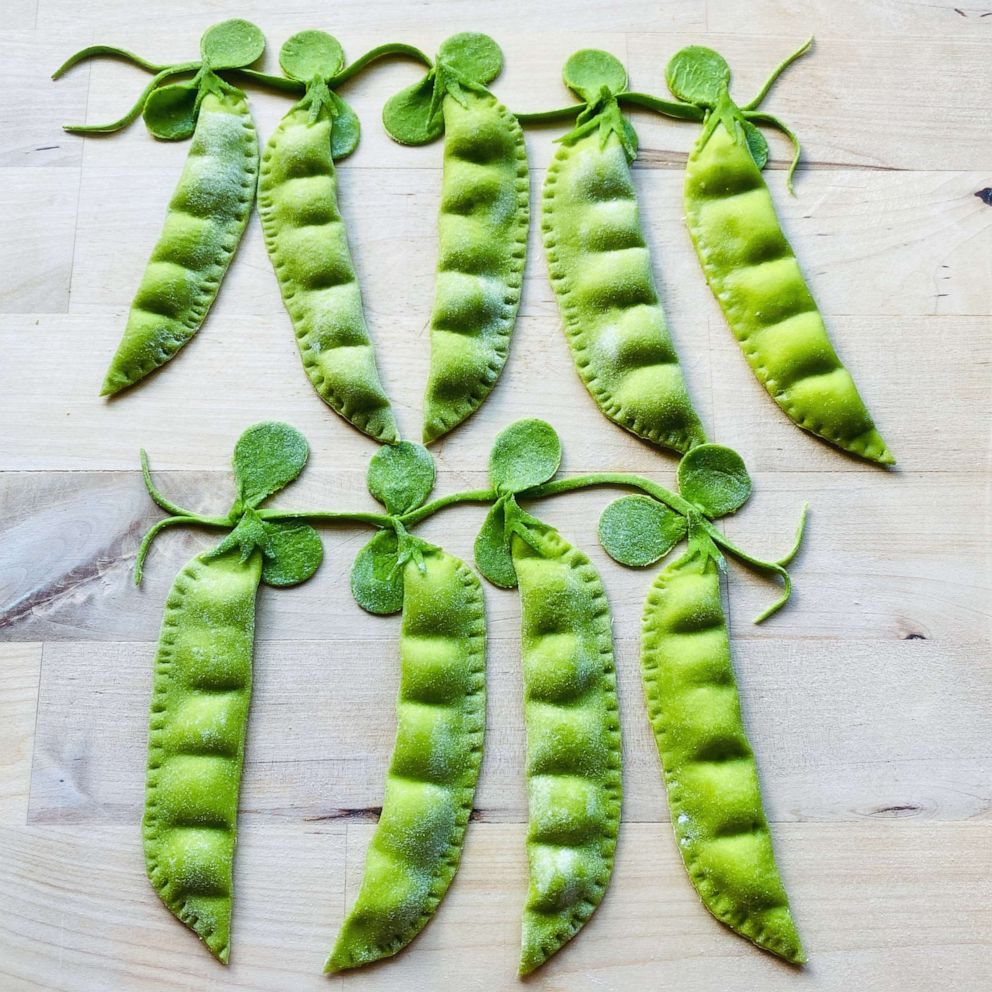
Who doesn't love fresh, handmade pasta? Add a filling, some flavorful ingredients and a stamp, fold or twist and you have ravioli.
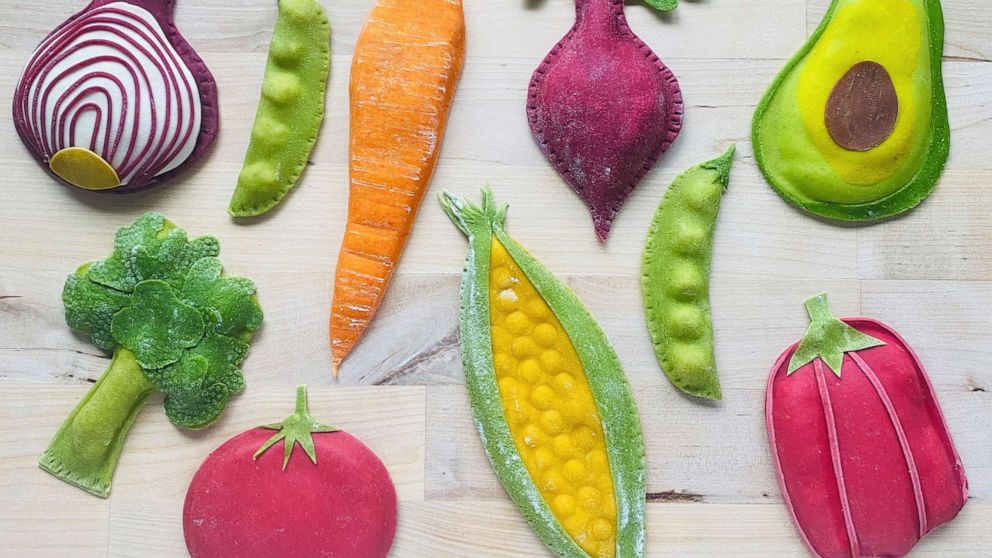
To help "Good Morning America" get ready to celebrate National Ravioli Day, well-established plant-dyed pasta artist and founder of Salty Seattle, Linda Miller Nicholson, shared her top pasta tips and a recipe for home cooks to try.
The pasta professional who has cranked out colorful and patterned sheets of dough for celebrities like Gigi Hadid, Katy Perry and more also teaches students both in person and through virtual workshops. So as a master of both making stunning dishes, she also knows exactly how to help make home cooks more comfortable while making her signature striped agnolotti recipe.
"I love to tell my students not to stress out. Pasta-making is therapeutic and zen -- channel that," she told "GMA." "If you are a ball of stress, the pasta can sense it and won't behave properly in your hands. Be calm and don't worry about messing up a few times. Eventually you'll develop muscle memory and it will all flow together beautifully."
Before diving into her technique and more tips, the Seattle-based "Pasta, Pretty Please," cookbook author explained that all filled pastas are various types of ravioli.
"A way to think about agnolotti, tortellini, caramelle, cappelletti, scarpinocci, triangoli, etc., is that they are all forms of ravioli," she said. "Ravioli is the bigger category that encompasses stuffed/filled pasta, so all filled pasta is ravioli, if that makes sense."

"Flour the pasta sheets more than you think you need to. If it sticks to the work surface or your hands, the pasta will stick to the pasta machine and cause a gummy mess," Nicholson said. "You really can't go wrong with scattering flour onto the pasta sheet when in doubt. Flour solves a multitude of pasta sins."
"Excellent pro tip that a lot of people don't think about -- store uncooked ravioli uncovered. If you cover it in the refrigerator, the filling will leach out through the pasta and cause it to become soggy," she advised. "No one likes soggy pasta!"
"Always use plenty of salt when boiling ravioli."
"Do not overboil ravioli -- the longer you boil it, the mushier the texture will be and no one likes mushy ravioli."
And last but not least, one of her biggest pasta pet peeves: "Ravioli is plural. Raviolo is singular. Never put an 's' on the end of ravioli, since it's already plural."
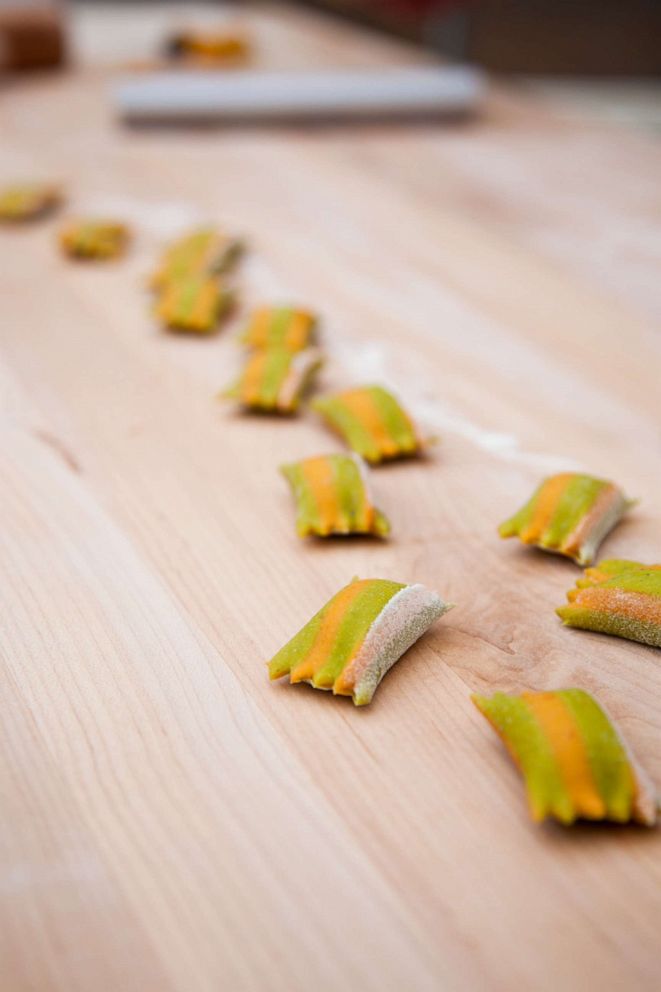
"When I want a lot of stuffed pasta, agnolotti is my go-to shape, because it's easy to form quickly and beautifully once you get the hang of it," she said. "There is something about the zen rhythm of pinching together hundreds of tiny pasta pillows that soothes the soul, not just the stomach. So, if you take the time to learn just one filled pasta technique, make it this one."
The technique used below, she said, "is technically called agnolotti dal plin in Piedmont where they were born to the tune of angels rejoicing long, long ago. Plin means 'pinch' in Piemontese dialect, and it refers to the fact that to seal each piece of pasta, one uses their thumb and forefinger to pinch the pockets closed."
She added, "While you won't use entire batches of pasta dough for this recipe, make the whole thing because it's easier not to divide it. Freeze what you don't use. It will keep for six months."
Serves: 4
Ingredients
Your favorite filling (Ricotta cheese, parmesan, ground meat)
2/3 batch parsley pasta dough (recipe below)
1/3 batch harissa pasta dough (recipe below)
Directions
Place the filling in a gallon-sized, zip-top bag and snip a bottom corner to make a hole approximately two-thirds of an inch in diameter. Reserve filling in refrigerator until needed.
Roll the 2/3 batch of dough out into a rectangle that is 4-inch wide and 2-feet long. Reserve it on a floured surface covered with a kitchen towel.
Roll the 1/3 batch of dough to the third-thinnest setting on a pasta machine, or until it is at least 2' long. Flour this sheet and cut it into strands using the fettuccine-width cutter on the pasta machine. Take care to lay the strands on the surface so that they don't tangle too much with one another, or they may stick together.
Uncover the base sheet and wipe it with a just-damp paper towel or culinary brush so that the strands will adhere to it. Lay the strands lengthwise along the sheet, starting with the side closest to you and working your way back. Try to leave less than ¼-inch gap between the strands, as this will stretch out when you continue to roll out the sheet. Be careful that the strands are flat and untangled, so that they lay evenly across the sheet. Repeat until the base sheet is covered in stripes. Gently press the stripes onto the base sheet with a rolling pin, to ensure they are adhered before sheeting with the pasta machine. Use a straight rolling cutter to trim any excess strands that extend beyond the base sheet.
Carefully roll the striped sheet out to the second-thinnest setting on a pasta machine. You may wish to cut it into two (or more) pieces as you sheet further, as it will make the sheets easier to handle, and you'll need to have room for the sheets to lie on your surface to stuff them.
Lay the pasta sheets on a lightly-floured surface with the pattern facing DOWN. Observe the edge of the pasta sheets that is closest to you. If it is excessively dry or uneven, use a straight rolling cutter to clean up the edge. Use your finger to distribute a 1" line of flour along the entire front edge. This helps prevent the filling from making the pasta sheet soggy.
Starting about 1 inch in from the end of the pasta sheet, pipe a line along the entire front edge, stopping about 1 inch from the far end. Roll the front edge of the pasta sheet over the filling onto itself along the entire edge so that you can no longer see the filling. Now roll it forward one more time. Start at one end of the pasta filling tube and pinch 1-inch segments of the filling, using the thumb and forefinger of both hands as you work your way down the filling tube. When you reach the end, you will often notice that the tube drops forward another partial turn onto itself, but if it doesn't droop over, don't worry, you can help it along in a moment.
By now, you should have a small lip of pasta sheet left all along the top edge. Some people keep this edge untrimmed and rustic, but for a classic agnolotti look, you can cut along the entire back edge with a fluted rolling cutter.
Finally, use the fluted rolling cutter to crimp/cut through every "pinch" along the length of the sheet. Your pinches provide the guide for where to cut, thus defining the final piece size of the agnolotti. As you get more proficient at agnolotti-making, you can play with making ½-inch or even tinier agnolotti, or even play in the opposite direction and make enlarged versions.
Repeat with remaining filling and pasta sheets until you run out of dough or filling, or ideally, both!
Allow the agnolotti to rest for 30 minutes or up to 2 hours at room temperature before boiling. You may also store the pasta on a parchment-lined sheetpan uncovered in the refrigerator for up to 8 hours. Increase the cooking time by a minute if working with refrigerated pasta.
Boil in salted water for 3 minutes, drain, dress, and serve immediately.
Parsley pasta dough
Ingredients
1 bunch of parsley, bottom 2" of stems removed
3 large eggs
3 tbsp water
2 1/4 cups "00" pasta flour
Add parsley, eggs and water to blender. Blend on low speed at first to combine, then increase the speed and puree until smooth.
Strain the puree to remove any grainy threads.
In the bowl of a standing mixer fitted with a paddle attachment, combine the flour and puree. Mix on low speed until a ball of dough forms. Continue to knead, either by hand or in the mixer, for 3 minutes, so that the dough develops elasticity and silkiness. Seal the ball of dough in plastic wrap and let it rest at room temperature for 30 minutes before sheeting. Alternatively, you can let the dough rest for 24 hours in the refrigerator. The color sometimes intensifies after that, although the dough is still usable for up to three days.
Harissa dough recipe
Harissa is a delicious and versatile pepper spice paste with a smoky, elegant flavor that complements just about everything and is especially beloved in meat stews. Pasta made from this dough pairs well with ragu made with lamb, figs, and more harissa.
Makes: 4 servings
3 tablespoons harissa (Trader Joe's has a great one)
3 large eggs
2 tbsp water
2 1/4 cups "00" pasta flour
In a blender, mix the harissa, eggs and water on low speed, slowly increasing speed until a smooth puree forms.
Combine the flour and puree in the bowl of a standing mixer fitted with a paddle attachment and mix on low speed until a ball of dough forms. Continue to knead, either by hand or in the mixer for 3 minutes, so that the dough develops elasticity and silkiness. Seal the ball of dough in plastic wrap and let it rest at room temperature for 30 minutes before sheeting. Alternatively, you can let the dough rest for 24 hours in the refrigerator. The color sometimes intensifies after that, although the dough is still usable for up to three days.
Recipes reprinted with permission courtesy of Salty Seattle.